I decided to write this article to help anyone in need of any and all information related to bouldering. This is a very long article, so if you’re looking for something specific then please use the Page Jumps below to navigate to the subheading that suits your needs.
Currently, bouldering is and has also been my favorite form of rock climbing. It’s the type of climbing I practise 99% of the time. Because of this I have decided to write an article covering the whole topic which will hopefully answer any questions on the topic.
I’ve also linked a few more internal and external articles and/or videos here relating to the subheadings that I hope you will also find helpful. But anyway, let’s get on with it shall we?
Page Jumps
- Bouldering Basics
- More Bouldering Tips
- Bouldering Etiquette and Safety
- The Best Bouldering Gear
- Bouldering for Kids and Toddlers
- Bouldering Grades
Bouldering Basics
Before you undertake any sport it’s best to understand the basics so you can learn faster. I’ve thought of a list of bouldering basics which I wish I’d have learnt when I first started bouldering. These have been taken directly from my Bouldering Basics article.
Warm up/Cool down and stretch
Warming up is essential for any climber to avoid injury because we are putting a lot of load onto our muscles, tendons and ligaments that we may not use normally in everyday life. Cooling down also avoids the feeling of being stiff for the next few days. Do not skip this part of your session whether indoor or outdoor. If you’re bouldering in a cold environment it is even more crucial that you warm up to avoid pulling your muscles, ligaments, and/or tendons. There are many different ways to warm up, but the most common ways of warming up when climbing are:
- Using lighter weights to heat up the muscles making them more flexible
- Practising slow pull ups
- Climbing lower graded climbs slowly with controlled technique
- Doing easy, full body and/or dynamic exercises such as star jumps and burpees
These exercises can also be used to cool down at the end of a session. Most casual climbers don’t take warming up too seriously. They’ll generally do the exercises mentioned above and a lot of them will become injured every now and again when injury could’ve been avoided by completing a set warm up routine. Warm up routines increase blood flow to the muscles, help the body become flexible and therefore decrease the risk of injury.
Let’s go through a warm up routine that uses full body exercises, stretching and controlled climbing.
- First off let’s get our muscles warm by increasing the blood flow. We can do this in a number of ways. If you’ve cycled to the climbing gym, you could use that as a part of your warm up. Otherwise you may want to complete these aerobic exercises: run on the spot for 60 seconds, then go straight into 10 star jumps, and then do 5 burpees, and then 20 squats. This should get the heart going. If this is too much for you then you can half the number of reps in the exercises and repeat it after a minutes rest.
- Once you’ve done that you’ll need to stretch your muscles. Dynamic stretching is the best way to stretch before you climb as it prepares your joints for high intensity by releasing synovial fluid into them providing lubrication. Here’s a dynamic full body stretching routine:
- We’re going to first stretch the neck by sitting or standing with good posture then, slowly, look left 90 degrees and look right 90 degrees. Let your neck act like there’s a spring of some sort on each side slowly pulling it away from the other. Do this 5 times on each side (Note: if you have a facet injury in the neck then you may want to avoid this).
- Windmill your arms forward 10 reps and backwards 10 reps to warm up your shoulders. Again, do this slowly, don’t rush as this can cause injuries.
- Complete 5 lunges on each side to stretch your hamstrings, glutes, and quads.
- Sit down in a cross legged position, now uncross your legs and put the bottom of your feet together and butterfly your legs. This stretches your groin.
- Climb slowly on the climbing wall. With every jug you grab you should allow your body to drop a bit – you’ll usually feel a stretch on your forearms, shoulders, back and maybe even your pectorals. Do this for 5 controlled climbs.
- Once you’ve stretched yourself out on the wall it’s time to warm up by climbing. Your fingers need warming up properly before you start climbing on harder grades so you need to climb slowly, with controlled technique on a grade you find very easy. Do this for at least 5 climbs. You can usually tell if you’re warmed up enough. If you’re a beginner and you don’t find anything easy then you can do 1 of 2 things. Either find the circuit board or training board and traverse (climb sideways) for a short time before you feel your arms becoming “pumped”, or you can find a place on the wall to do this if there’s no option to use a training board.
A cool down can also be done at the end of every session. Climbing on lower grades, slowly with controlled technique is one way to cool down. You should also add the majority of the dynamic stretch routine to your cool down.
You should know your bouldering terrain
Outdoor vs Indoor
Knowing the difference between outdoor and indoor climbing is crucial when climbing outside for the first time. When climbing outdoors there’s one main difference that becomes obvious quite quickly: climbing on brightly colored holds is a lot easier than finding a route on rock that isn’t obvious to the climber. When you have the guiding pathway that these colored holds give you, it becomes so much simpler than climbing a route which offers no real guidance.
When outdoor climbing you may find that you’re feeling around for holds a lot more or feeling how good a hold is than you are actually climbing. With indoor climbing this doesn’t usually happen as much.
Outdoor climbing is very peaceful and usually there aren’t as many people around causing fall hazards. Don’t forget, when climbing on outdoor rock you’re much more likely to get scratches and scrapes than you are on an artificial wall.
Outdoor rock may be covered in dirt or sand and can therefore be more slippery and confusing for the climber than holds that are used in a gym – climbing gyms don’t often replicate muck and dirt particles on their climbing holds. A lot of outdoor climbing holds can also be more polished than the majority of indoor holds which increases the chance of slipping.
Outdoor bouldering is also considered harder in terms of grades. A V2 in a gym is considered a V0 outside.
Climbing on Different Types of Rock
Rock types differ in their ease and feel when climbing on them. Limestone is considered one of the hardest rocks to climb on due to it usually having a more polished nature. Sandstone is considered easier, however you should not climb on sandstone within 24 hours of rain as the rock can absorb the moisture. If you climb on sandstone while it contains water then you have more chance of breaking it off the wall and therefore ruining the climb while also wasting your time trekking your way out to a crag. It has been said that granite is one of two things: a dream to climb on or very sharp causing pain, flappers and cuts on the hands. For a detailed article on the different types of rock climbers find outside click here.
Join in with a group of more advanced climbers
If you want to progress faster it’s a good idea to learn from someone who’s better than you. When I started climbing I went with my friend Dan. Dan knew someone who was climbing in the same gym and was around a V7 climber so we ended up joining in with their group. The amount of information we got over a few sessions with them was so useful that it helped me progress very quickly. Dan and I became V3-4 climbers in around 1 and a half months. We also understood different ways to enhance our climbing experience including gym routines, using the circuit and training boards, using hangboards, and other exercises. If we had any questions related to experience all we had to do was ask them.
I’m not saying you won’t progress if you’re climbing on your own. However, it’s proven that having a coach helps you learn faster. These more advanced climbers can act as your coach free of charge.
Watch more advanced climbers
Watching other people climb sounds simple but what I truly mean by this is you have to SEE what someone is doing and try to understand why they are doing it. I understand that watching people that are better than me with a close eye helps me with my own climbing. For example, when I first started climbing I noticed better climbers sag on certain parts of a climb. It always looked uncomfortable to me however I tried it myself eventually and was shocked when it seemed to work. This led me onto using more movements that I noticed others using on harder climbs. I had a hard time with foot swapping at first, but by studying foot swaps from those with more experience this helped me become a lot better at them. Study the moves individually that more advanced climbers use to transition from hold to hold. If you want you can even try a specific part of a harder climb to practise that move or transition. This will be useful for you in the future on other problems.
Some things, however, can’t be taught. You can’t be taught confidence on a slab when you’re full of fear, for instance. You can watch climbers complete problems like this all day but it’s your own mental hang-ups that are affecting your success in these departments. If you’re having trouble with a fear of heights or fear or falling you can check out an article I’ve written by clicking here.
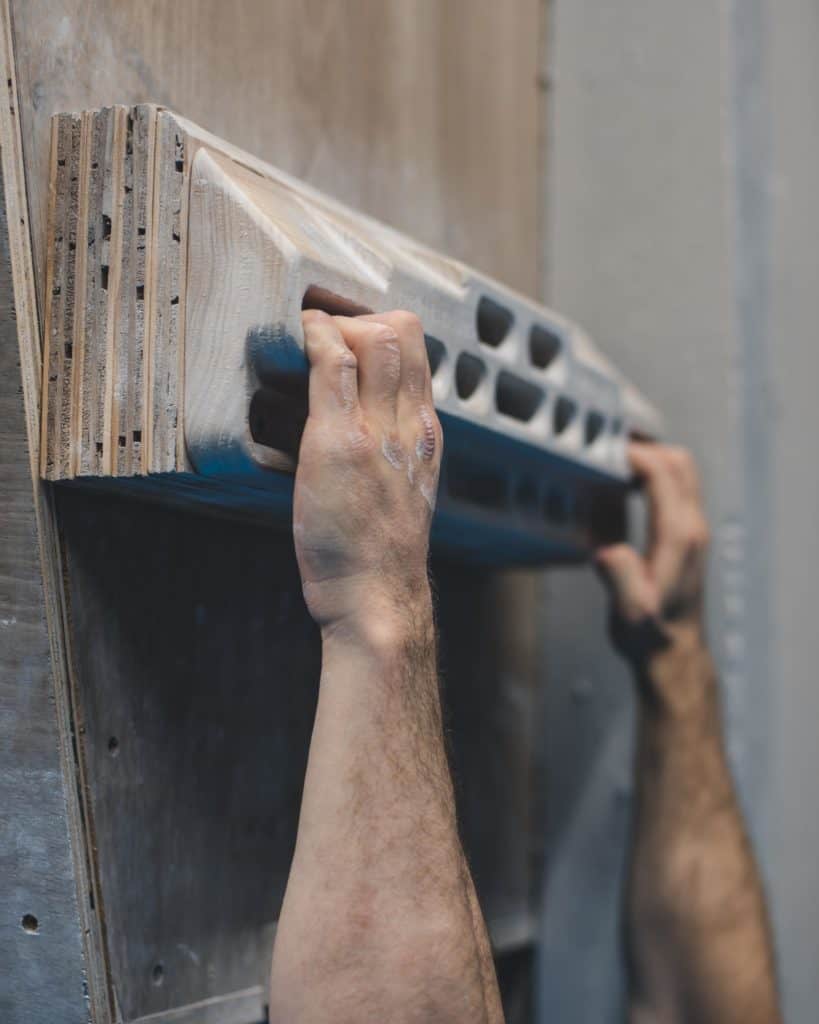
Use a hangboard (aka a fingerboard)
A hangboard is a piece of equipment usually made of wood or a plastic resin that helps to strengthen your fingers. It contains multiple gaps to place each hand which you can use to widen your grips or put your hands next to each other to train different muscles. Generally, hangboards will have different size gaps that make the hang easier or harder. This is because your fingers can either grip more or less which can then cause more or less stress on the finger flexors. If your grip strength isn’t very good then you’ll probably have trouble on the smaller grips.
There are different exercises you can do on hangboards to help increase your grip strength which can be done at the start or end of a session. One simple exercise is to hang from a matching couple of holds for 10-15 seconds – if you can hang for more than 15 seconds then use smaller holds. Rest for a minute between each hang. After four hangs rest 5 minutes. Repeat this process another 2 times hanging for a total of 16 times and resting for a total of 27 minutes.
Eventually you may be able to do one handed hangs using the hangboard. This comes with a lot of practise. Using the same method above on each hand can also help increase grip strength once you seem to have a lot already.
Hangboards are available to buy so that you can place them in your home or garage. You can find more info about hangboards and my opinion on the best hangboards by clicking here.
All climbers find their feet
There is a saying that good climbers climb with their feet. You need to find your footholds before you transition. This is because without a base you’re a lot more likely to fall off. Most beginners will focus solely on the hands and forget every now and then about their foot placement. This puts too much pressure on the upper body and takes away from technique, meaning you learn less and have more chance of becoming injured.
Of course, the solution here is to focus on your foot placement before you make a movement. If the foot placement isn’t obvious, for example if there isn’t a definite foot hold nearby, then you may need to smear on the wall or apply some other technique to complete the transition. If the base of your body is stable, it is near impossible for you to fall, whereas your arms will eventually tire if they are the only two points of contact on the wall. Your legs are a lot stronger than your arms.
This is why foot placement is so critical when climbing. Find your feet in some way or other first before transitioning onto the next hold.
Don’t rush
You should think about your next move before you rush into it. Bouldering outdoors or in an indoor gym has no time limit so climb slowly if you can. You’ll notice that climbing slower helps you keep your balance and use controlled technique. By rushing you show that you have improper technical climbing ability. Make sure your hand and foot placements are correctly positioned and focus on any transitions. If you don’t you’re not practising correct technique, you’re practising incorrect technique that can then turn into a habit. Bad habits breed bad luck.
Don’t get annoyed
If things don’t go your way don’t get annoyed because this will just make you climb worse. This is something I think really does affect some climbers. Sometimes there’s that one problem that really annoys you which, unfortunately, affects you for the rest of the session and therefore ruins your climb. If you start to get annoyed move away from a climb and forget about it. Leave it for another session.
I also find that it’s easy to get annoyed if you don’t seem to be on your game, or you can’t complete any climbs. If this ever happens I realise it’s best to get a win under my belt, so I climb something that’s a bit easier that I’m sure I can complete. Sometimes I need a few wins under my belt to feel a bit better, and then I’ll carry on with the harder climbs, confidence intact.
Anger is the worst emotion to put into a sport like this. It makes you lose focus, causes your body to shake due to your internal rage, and also stresses you out. Climbing is a sport that requires concentration, a stable body and mindful movements.
Safety first
Make sure you don’t endanger yourself or any others around you. Bouldering indoors is much different to bouldering outdoors. When bouldering outdoors you are less likely to have someone fall on you unless you only boulder inside at times when no one’s around. You must make sure that you aren’t likely to be fallen on, or that you can fall on anyone, or that you or someone else can fall on any equipment that may cause injury.
When bouldering outdoors, you are more likely to fall on rock if you have misplaced your crash pad. Indoor bouldering usually has a safety mat throughout the whole gym so the only way you can really hurt yourself from falling is by falling on someone else, on part of the wall or on equipment.
It is advised for safety purposes that you are well aware of your surroundings, make sure there’s no equipment in fall zones, don’t climb underneath anyone else or start a route that crosses theirs, and if you are a guardian of someone else you should be aware of where they are at all times.
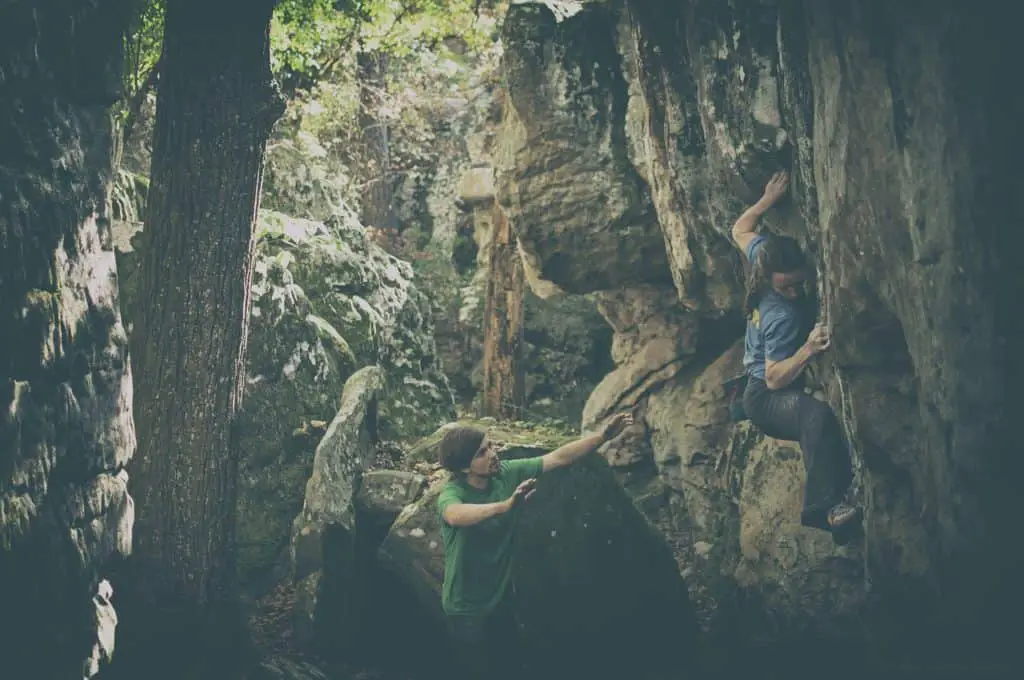
Try bouldering outdoors
If you haven’t already tried it, outdoor bouldering is a really good experience. Bouldering outdoors is so much more peaceful than indoor bouldering – there’s usually no manmade noise pollution so you only hear the sweet noises of nature; the tweeting of the birds, the breeze moving the trees around you, sometimes you even hear the rush of a river or a stream in the surrounding area. It’s so calming that it really helps you focus. I find it to be a form of meditation while you exercise. If you’re thinking about bouldering alone whether outdoors or indoors, I’ve written a detailed article with tips to help you which you can read by clicking here.
The rock you’re climbing on is usually a lot harder to grip than most indoor holds. Outdoor climbs are generally more difficult than indoor climbs because the holds can be more slippery, covered in muck or debris, or more painful/sharp on the hands. By bouldering outdoors you’re adding something more to your game. Until you’ve tried it you won’t understand how much different it is to indoor bouldering. You have to actually workout the foot and handholds yourself because they aren’t a dedicated color to a particular climb and therefore it takes a lot more focus. Once you boulder outdoors you’ll realise how much easier it is to boulder indoors.
There are pros and cons to each experience. Bouldering indoors offers a massive safety mat all the way through the gym, and usually includes a café and shop inside. You don’t need to bring a lot of gear other than climbing shoes, a change of clothes, chalk and chalk bag, and water. When bouldering outdoors you’ll need to bring a massive rucksack full off food, water, equipment and crash pads.
Outdoor bouldering requires good weather. Now, when I say good weather I don’t mean hot, sunny weather because this means it’s going to be quite sweaty on the hands. Sweat is not what we want when we’re climbing because we’re more likely to slip and fall off each hold. That’s why we use chalk, to absorb the moisture on our hands making it easier to grip onto each handhold. But there’s only so much that chalk can accomplish – if it’s a very hot day then no matter how much chalk you use, your hands will be sweaty. A dry, mild day is considered the best kind of day to boulder in; something not too hot or not too cold and without rain to affect the rock wall.
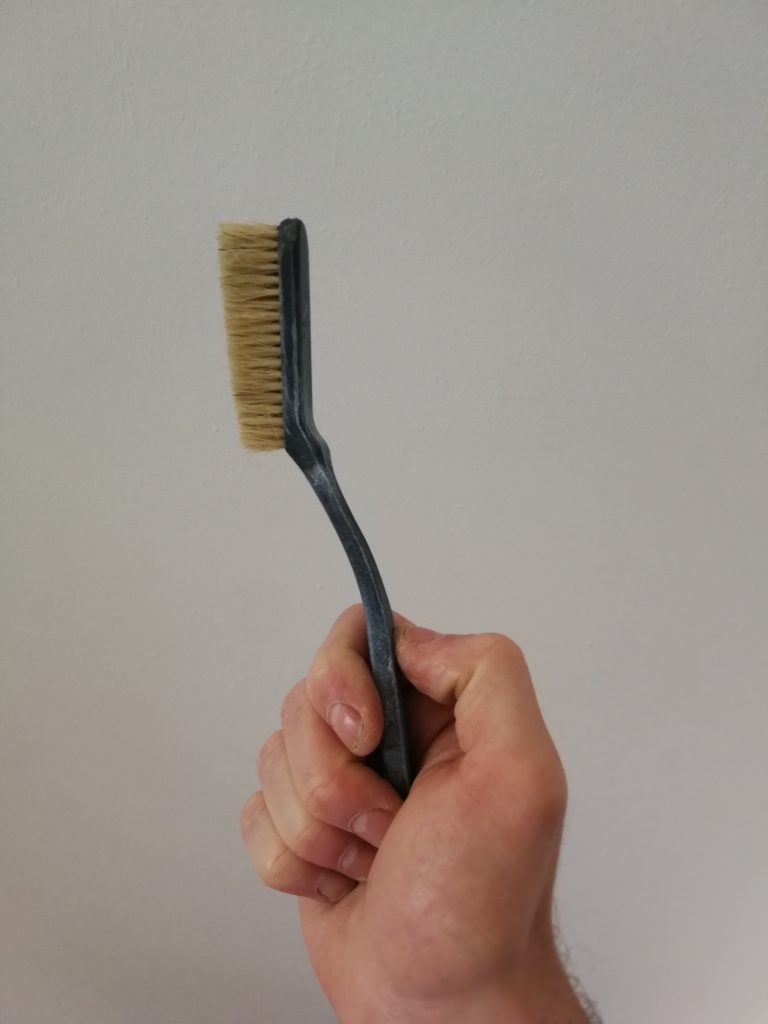
Get a good brush
A good brush for use on chalky holds is definitely needed. There are many different size brushes that you can buy from toothbrush size all the way up to dust pan and brush size. Personally I have 2 brushes, one for very small crevices – a tooth brush sized one – and one for bigger holds that require a bit more pressure. My bigger brush has a little dip on the neck that’s designed for you to put pressure down with your index finger meaning you can build more power as you clean the hand holds that are full of chalk.
For the first few months of my climbing journey I was LITERALLY using a tooth brush to clean the holds. To be honest, it really does work for those hard to get to crevices, but for the bigger holds that require more momentum it was useless. This was when I started researching into the best climbing brushes. I thought about just buying a generic one from the gym shop but someone advised me against that and told me about the Sublime Slimline brush and it’s design feature (the dip on the neck) and how useful it is. So I went for it and have been very pleased ever since. Just note that after a bit of use you will need a new brush.
If you buy climbing shoes, make sure they suit your needs
When buying climbing shoes there are a number of factors that you should consider. Some people buy rock climbing shoes based on what they’ve heard from other climbers or from shop assistants. The truth is not everyone knows your climbing situation. For example, there are a few questions you should consider:
- Do you purely boulder or do you lead climb as well?
- How often do you climb overhangs compared to slabs?
- How wide are your feet?
- What’s your budget?
- Would you consider yourself a beginner, intermediate, or advanced?
- On average, how long does your usual climbing session last?
- How durable should your shoes be?
If you lead climb or do any other type of climbing than bouldering then you may want to consider buying climbing shoes that are known to be quite versatile. If you buy versatile shoes such as the La Sportiva Miura when you only boulder, it’s slightly pointless when you could get better shoes suited for your specific type of rock climbing for the same price.
If you don’t climb overhangs all that often and aren’t considering venturing into them any time soon then there’s not much point buying shoes that are well-known for their toe hooking advantages such as the Scarpa Instinct VS or the Five Ten Anasazi Pro. If you climb overhangs then you’re going to be toe hooking a lot so you should consider this as a factor.
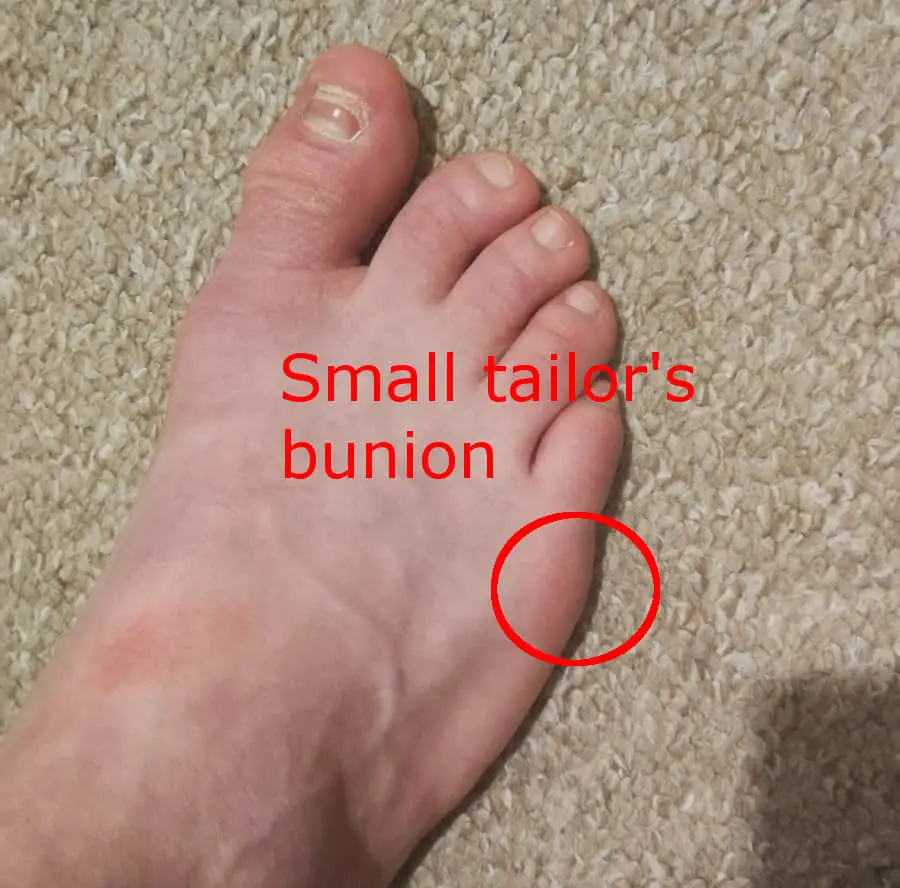
If you’ve got wide feet then you need to find a pair that suit your needs. You can usually do this by trying on the shoes at a local store. I have wide feet myself – apparently I have developed small tailor’s bunions on each foot which I’ve had since I was a child. The climbing shoes I use for wide feet when bouldering are the Scarpa Instinct VS.
If you’re on a budget then there’s no need to worry, there are still some good shoes out there for less money including the Scarpa Velocity V which I found was a good shoe when bouldering for the price. However, you’ll have to decide on the other factors mentioned here as well.
If you’re a beginner you should be looking into shoes that will suit your needs. What’s the point buying an aggressively arched climbing shoe if you have no real need for it? Not only are you hurting your feet, you’re also wasting your money when it could have been spend on better shoes for your situation. For more advanced climbers you probably shouldn’t waste your time on shoes aimed for beginners unless it’s specifically because you want more comfortable shoes.
If your climbing sessions usually last a long time then you’ll probably want a pair that aren’t going to make your feet feel numb after an hour of using them. Therefore you’ll want a neutral arch on the sole. An aggressive arch is advised for people who are willing to endure an uncomfortable climb for a short amount of time. Climbing many hours at a time requires more comfortable shoes.
If you’re looking for durable shoes you have to be aware that the rubber is harder and therefore less sensitive on your feet, therefore you lose other benefits. Would you be interested in sacrificing precision or other advantages that the climbing shoes may offer for more durability?
More Bouldering Tips
Clench your foot like a monkey on slippery holds
This seriously helps to grip onto holds that have you slipping off.
Work on your strengths AND weaknesses
Don’t just advance on types of climbs you’re good at, work on your weaknesses too.
Find someone around your level and compete with them
By bringing in a competitive edge, you will want to get better faster and will push yourself more.
Use the circuit board
Using the circuit board helps to improve your climbing technical ability, endurance and strength.
Bouldering Etiquette and Safety
Bouldering can be a very dangerous sport. Over 70% of injuries in climbing are because of bouldering rather than other types such as lead climbing. This is why you need to really focus on your safety before and while you’re bouldering. Let’s talk about what we can do to ensure you have the safest experience possible while bouldering indoors and outdoors.
Bouldering Etiquette
Bouldering etiquette is the climbing code all boulderers should follow for safety purposes and as a way of general politeness. It’s a few (usually unspoken) rules. These are:
- Be aware of your surroundings. If someone falls on you it’s your fault! If there’s an area in the gym that someone can fall on your or your belongings then move yourself and your gear.
- If someone’s on the wall before you then make sure your climbing route does not intersect their climbing route.
- Don’t give out advice unless someone actually wants it. When you’re on a climbing wall you’re trying to solve a problem – that’s half the fun of the climb! Don’t ruin another person’s fun unless they ask you for advice.
- Take turns on the wall with other climbers. Don’t hog it all for yourself.
- Don’t jump on the wall after someone’s just brushed a hold. They’re brushing the hold so that excess chalk isn’t impeding their climb. If you go on the wall you’ve literally just added excess chalk to that hold which means they’re going to have to brush it again!
- Don’t yell or shout in frustration. If you’re going to do it every now and again then fair enough but don’t make it an ongoing thing. It’s annoying.
- If you’re not sure about something, just ask a more experienced climber. Climbers are usually very helpful with beginners – whether it’s a technical question about bouldering or a general question about the rules of the gym.
- Make sure any children you’re with stick to you at all times and follow the same rules listed above.
Bouldering Outdoors
Climbing Crash pads
These are the most essential part of your kit when it comes to your safety when bouldering outdoors. If you fall when you’re bouldering, which is very likely to happen you’re probably going to want to fall on something that is going to cushion your body/head. It sounds simple right? You’d be surprised at how many people climb a few months and decide to start climbing a rock outdoors while they’re with their mates in the countryside when they haven’t got any mats (or the right gear in general). Don’t be silly, buy a few crash pads and use them.
Climb in a Spot with Cell Phone Reception
Imagine you injure yourself badly and need medical assistance. It’s up to you but if you really want to be safe you should find a spot with cell reception and keep your phone close to you. If you fall you want to know where EXACTLY you are so you can ring for an ambulance and give them any information. Therefore I’d advise finding your coordinates on Google Maps.
Bring a First Aid Kit
Do I really have to explain this one? It’s better to have it and not need it than need it and not have it. Plasters, antiseptic wipes, bandages, and safety pins are just a few things you’ll need to bring with you. If you’re around other people they’ll be there to help you use the first aid kit if something does go wrong.
If you’re thinking about bouldering outdoors on your own I’ve written an article about this which you can find by clicking here.
The Best Bouldering Gear
Climbing Shoes
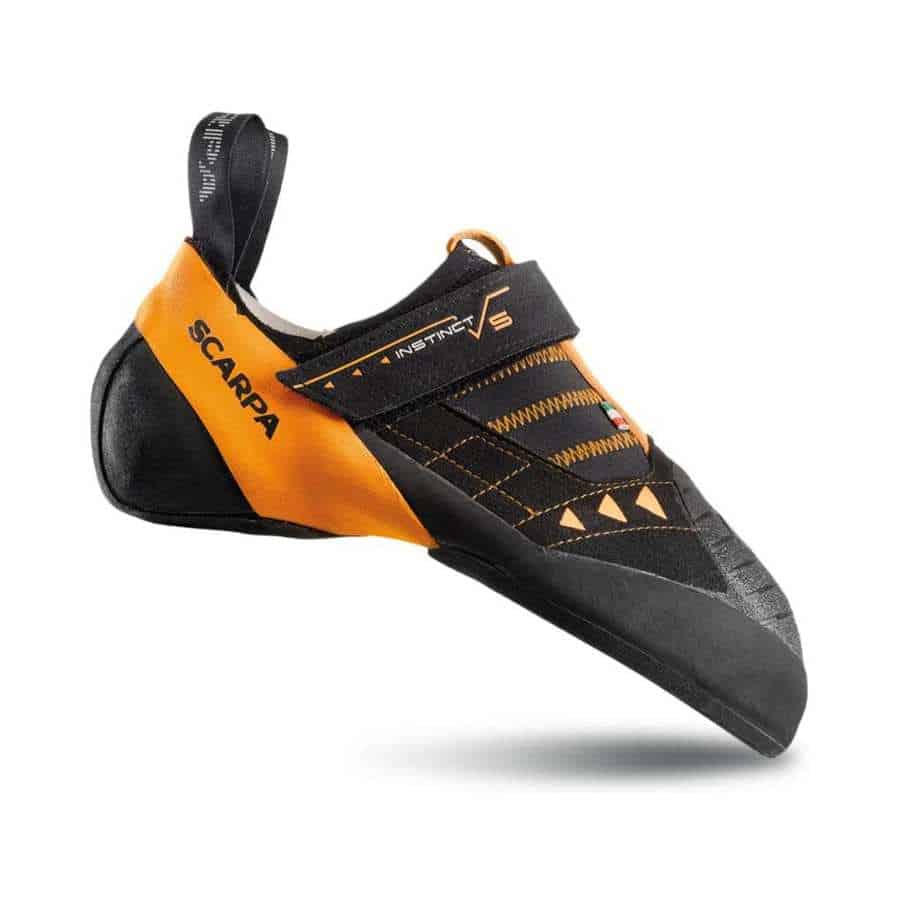
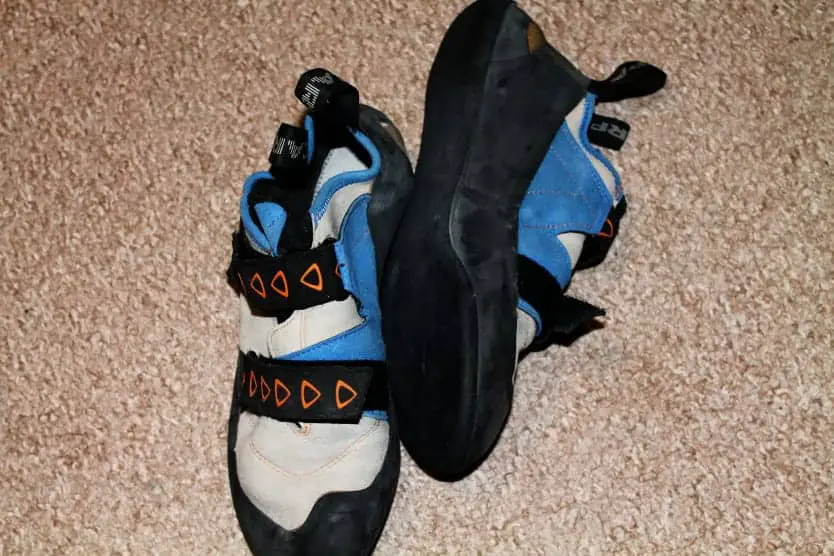
My favorite climbing shoe is the Scarpa Instinct VS. It’s the shoe I wear most because, in my opinion, it’s the perfect bouldering shoe! Don’t get me wrong, there are more precise shoes out there for short, steep routes. But the Scarpa Instinct VS is so comfy that I’d rather sacrifice a slight bit of precision to be able to climb an extra hour or two.
The upper material is made of microfiber, which is lighter but slightly less durable than leather. The Scarpa Instinct VS has been shown overall to have quite a bit of durability. This, unfortunately sacrifices a bit of precision. However, it’s not enough for me to warrant buying more precise shoes and spending more money or losing too much comfort.
The shoes are comfortable, however when your feet swell up due to heat you can really feel it as the shoes don’t seem as stretchy as your typical beginner shoes. The Velcro straps on the shoe help make it easier to take the shoes on and off in between problems if the shoes get too uncomfortable.
If you’re looking for a sensitive or precise shoe then you will get one here, it isn’t the absolute best but for me it’s precise enough alongside the durability and comfort of the shoe as well.
For more info on my top climbing shoes click here.
Crash Pads
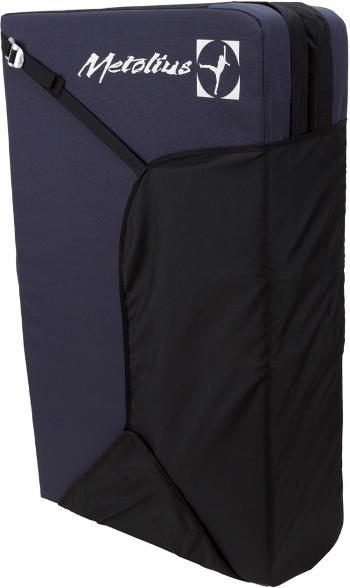
The Metolius Session II Crash Pad is the best value for money crash pad on the market out there. There’s a flap closure system which makes the pad easier to load, and it then reverses to cover up the shoulder straps while you’re bouldering. Once it’s unfolded there’s 2 drag handles so you can position it a lot easier. The fabric on the outside is durable so if you’re using it regularly it should last you a long time. You even have a place to wipe your shoes clean on the carpeted logo. The shoulder straps mentioned earlier are padded, making it as comfortable as possible to carry when you’re aren’t climbing. The waist belt is also included. It’s also a lot cheaper than most other crash pads.
Hangboards
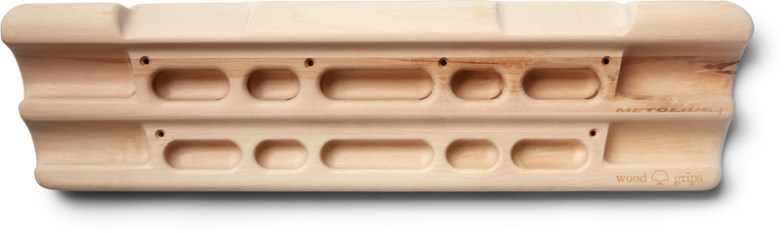
This Metolius Wood Grips II Climbing Board is my favorite hangboard. I just prefer wooden hangboards. They’re smoother on the skin, better for the environment, and stronger. Plus Metolius always make quality gear. For more info on hangboards click here.
Chalk Bags and Chalk Buckets
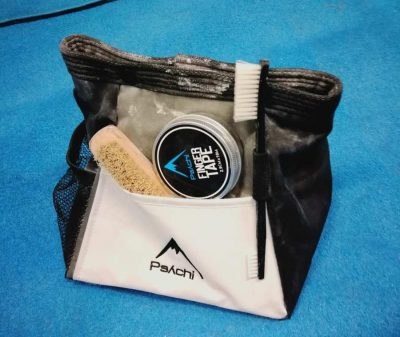
My favorite chalk bucket is the Psychi Abyss Bouldering Bucket. I am actually amazed at how cheap this bucket is to say how durable, versatile and convenient it is. It can be bought on its own or as a starter kit which is perfect for beginners and includes finger tape, a 100g bag of chalk, a double sided plastic chalk brush and a wooden boar chalk brush.
The base is very wide and padded to keep it stable. There is nothing worse than knocking over your climbing bucket and losing half of your chalk. There’s a handle at the back for ease of transportation and it has a zipped pocket for your valuables. The front can carry any brushes in the looped handle. The bucket has a LOT of storage for brushes, finger tape and anything else you need to store.
The opening is very wide for large hands, but it can be shut tight due to its secure popper-stud closer, making sure for spill-free climbing sessions. The interior material is a soft, fleece lining for a comfortable chalking up experience. This bag is very popular because of it’s value for money. It comes in 5 different colors.
For more info on my favorite chalk bags click here.
Bouldering for Kids and Toddlers
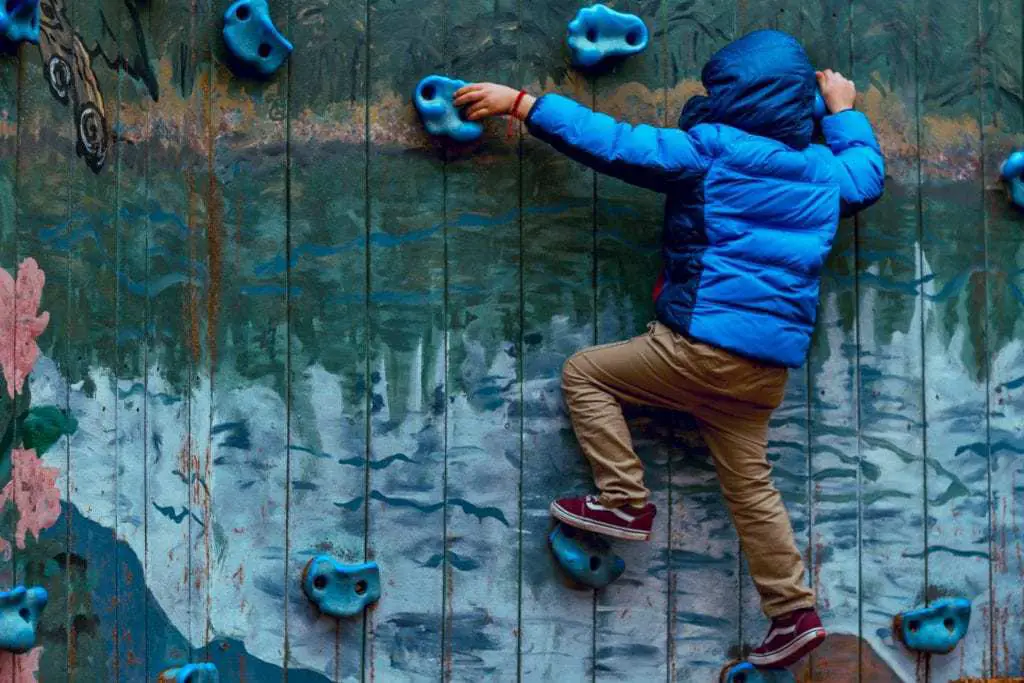
I’ve actually written a whole article about bouldering for kids and toddlers including safety, rules, bouldering games and tips which you can find by clicking here. For now let’s just go over the safety.
I’ve got a 2 year old son and I’ve been thinking about bringing him along with me to a bouldering session. When he’s a bit older I’m hoping that I can make it a hobby of his to promote his dexterity, hand eye coordination, and problem solving skills. However, I understand that bringing a toddler along with me to a climbing gym can be quite a risk to them and the climbers around. Therefore I’ve thought of 8 rules for a kid to abide by (if they can understand) and 8 rules for the parent/guardian. The child should follow these rules:
- No running around
- They must follow your instructions at ALL times
- They must not start a climb without your permission
- They must stick by your side at all times as climbers can fall from above onto them
- They must not climb above or below anyone else
- No screaming or yelling unless it’s an emergency
- No barefoot climbing
- Do not touch anyone else’s equipment (such as chalk)
And the parent/guardian should follow these rules:
- Keep your child at an arm’s reach distance
- Do not walk (with or without your child) underneath other climbers
- When your child is climbing, make sure you spot them correctly
- Do not let your child into over 18 only areas
- Know the actual climbing gym rules
- If the climbing gym is packed, think about not coming in with your toddler
- Spot any risks before they pose a threat
- Do not let your child bring food or drink onto the climbing mats
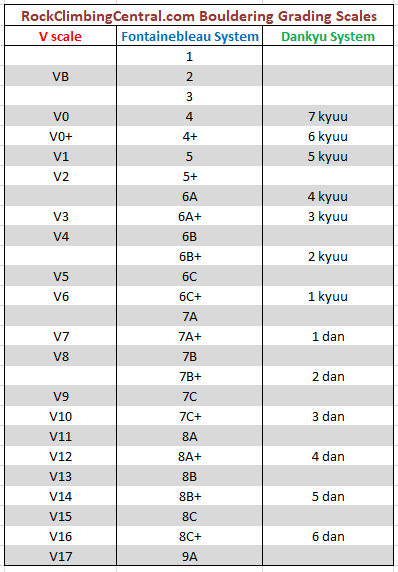
Bouldering Grades
Bouldering has five different grading systems:
- The V scale aka The Hueco Scale is the most used system in North America which includes gradings from V0-V17.
- The B system is used in North America and uses only three grades; B1, B2, B3. B3 being the hardest.
- The Fontainebleau system founded in France and is most widely used in Europe.
- The UK Technical grading system is used in the United Kingdom for trad climbs and was once used for bouldering.
- The Dankyu System which is used throughout Japan. The name originates from martial arts. The system is split into two – Kyu and Dan. The easiest Kyu grade is 7-Kyu and the hardest Kyu grade is 1-Kyu. The next hardest grade is 1-Dan. The Dan scale then ascends as the climbs become harder. The hardest ever recorded Dan was a 6 Dan. People often shorten the grades when typing or texting, e.g.: 3Q will mean 3-Kyu, and 1D will mean 1-Dan.
The most well known are the V scale, the Fontainebleau system, and the Dankyu system.